
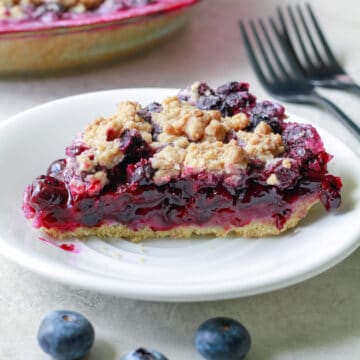
You will love this recipe for Canola Oil Pie Crust (3 Ingredients)! It's super flaky and very easy to work with. Fill it with your favorite filling and bake, or blind bake it for a no-bake pie.
This canola oil pie crust is an excellent recipe if you are a beginner or have had trouble with pie crust in the past. The dough is so forgiving and easy to work with. The outcome is a tender flaky pie crust that happens to be vegan. What more can you ask for?
I got the idea for this pie crust from Nana's Cookery off of Youtube. It's an old recipe I don't see much anymore. I tweaked it just a bit so that it's the perfect size for a 9-inch pie, or you can double the recipe for a top and bottom crust.
Best of all, you probably already have the ingredients at home.
Canola Oil Pie Crust Ingredients

For canola oil pie crust, you will need:
- All-purpose flour- I use regular all-purpose flour, but feel free to use whole wheat pastry flour if you prefer.
- Canola oil- You can use vegetable or olive oil instead of the canola oil.
- Salt- I use a half teaspoon of salt, but you can use more or less to suit your taste.
- Cold Water- Ice water works great.
- Optional add-ins: Try adding a tablespoon of sugar for a sweet pie crust or some fresh herbs if you're making a savory pie.
How to make a canola oil pie crust
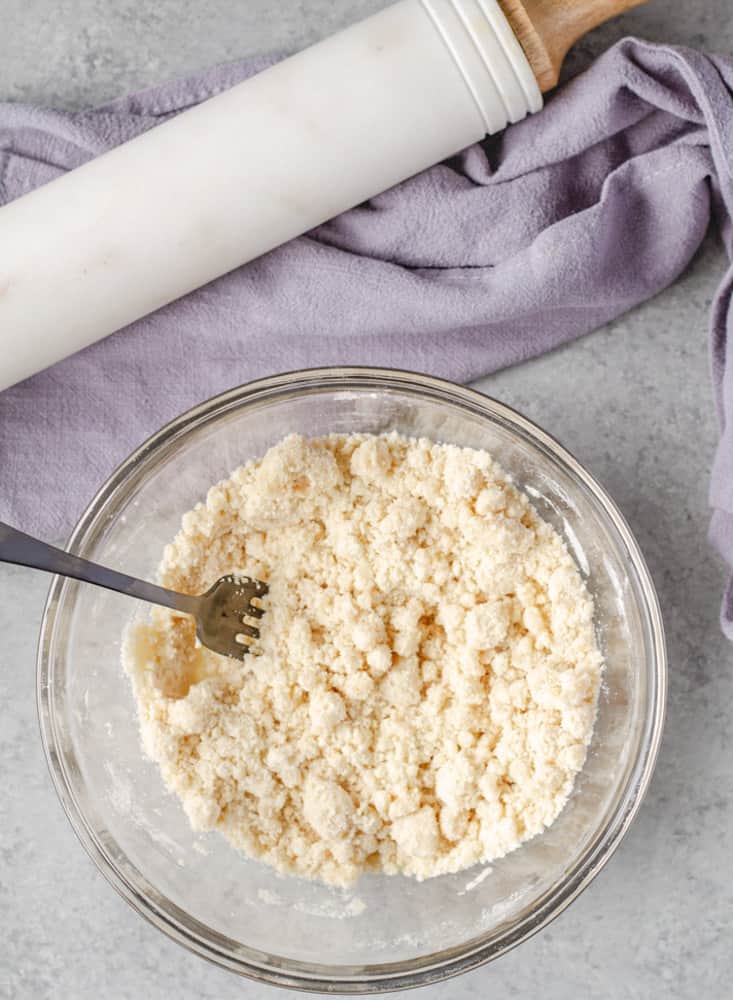
- Mix the salt and flour in a medium-size bowl. Add ⅓ cup plus 1 tablespoon of canola oil with the flour.
- Stir the mixture with a fork until it comes together and is crumbly.
- Stir in the water one tablespoon at a time until you can form a ball, being careful not to overwork the dough. It will look slightly marbled and that's ok.
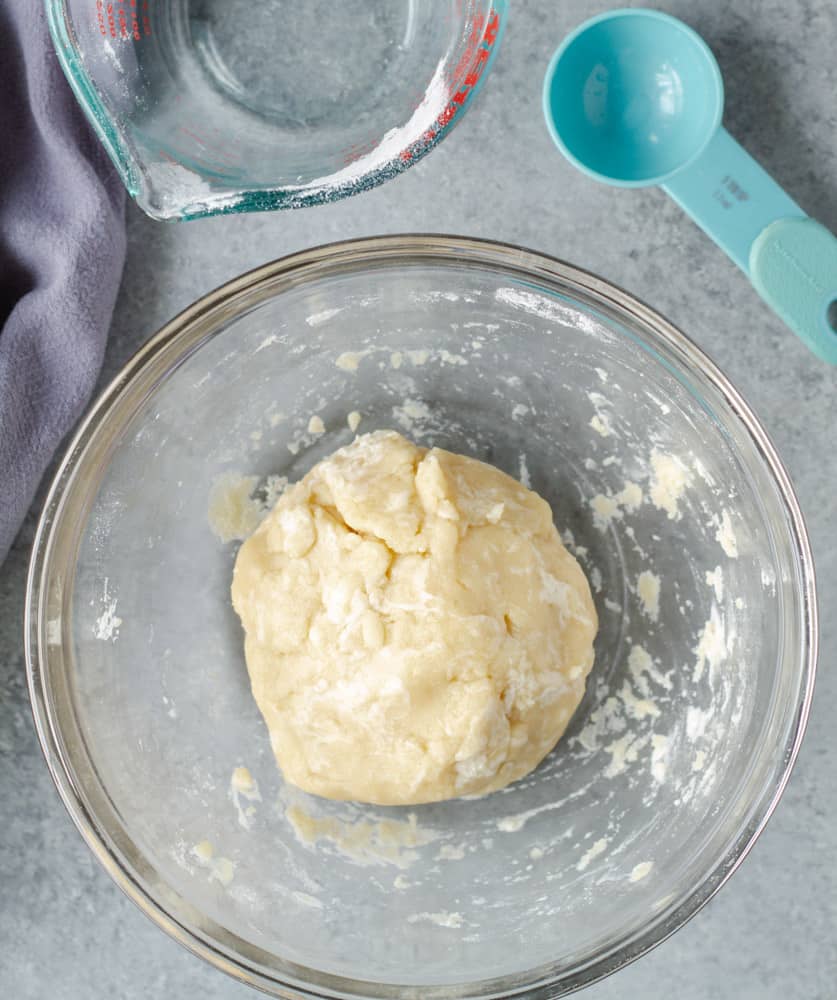
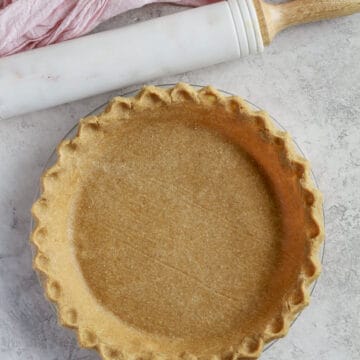
- Form a ball and flatten it slightly so that it's shaped like a disk and transfer it to a piece of wax paper. Cover the dough with another piece of wax paper and roll it out until you have a large circle. When rolling it out, start in the center and work your way out, turning the wax paper as you go.
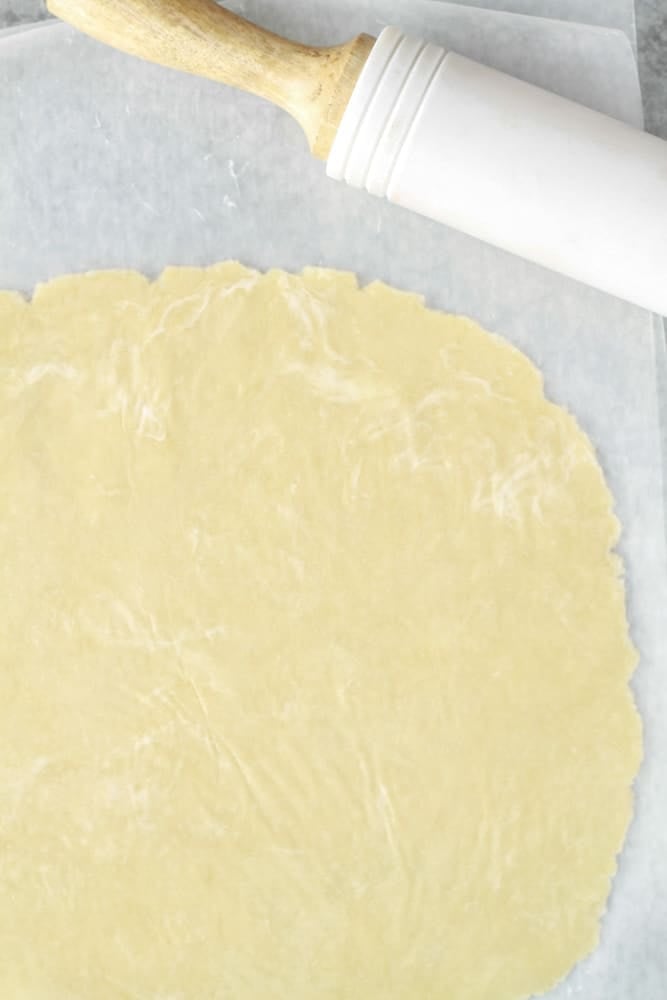
- It will not be a perfect circle and that's ok. Just do your best and roll it out until you have at least an inch overhang from your pie plate. Simply place your pie plate on top for reference.
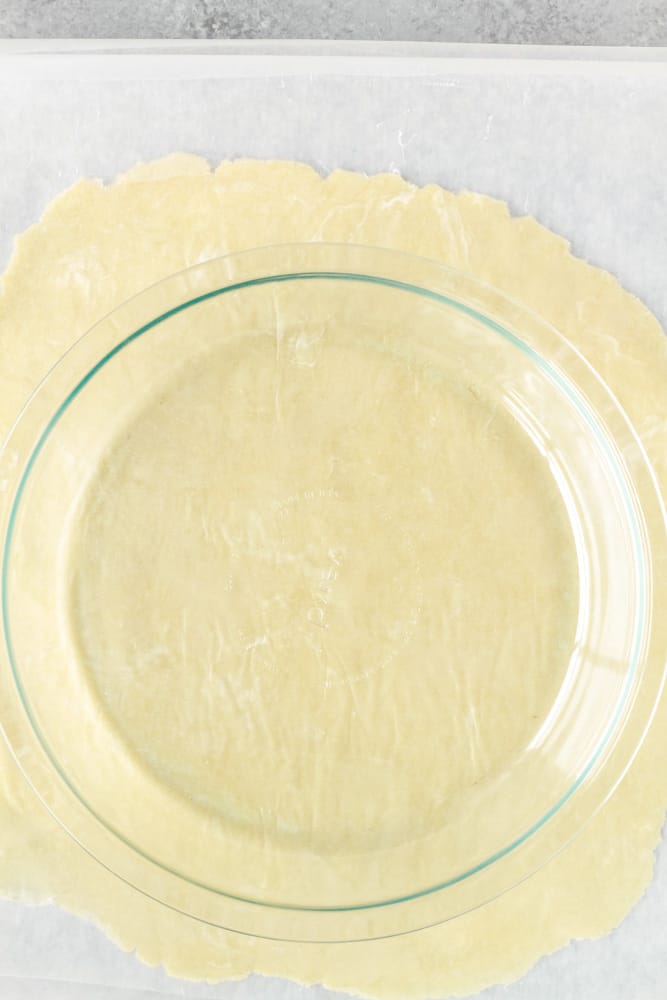
- Once it's the correct diameter, remove the top piece of wax paper very carefully. Gently release any dough that tries to stick.
- Invert your pie plate on top of the dough and gently slide one hand underneath the bottom piece of wax paper. Use the other hand to hold the pie plate and flip the plate so that the wax paper is on top. Just a little wrist trick. Now remove the wax paper, and the dough should be inside your pie plate.
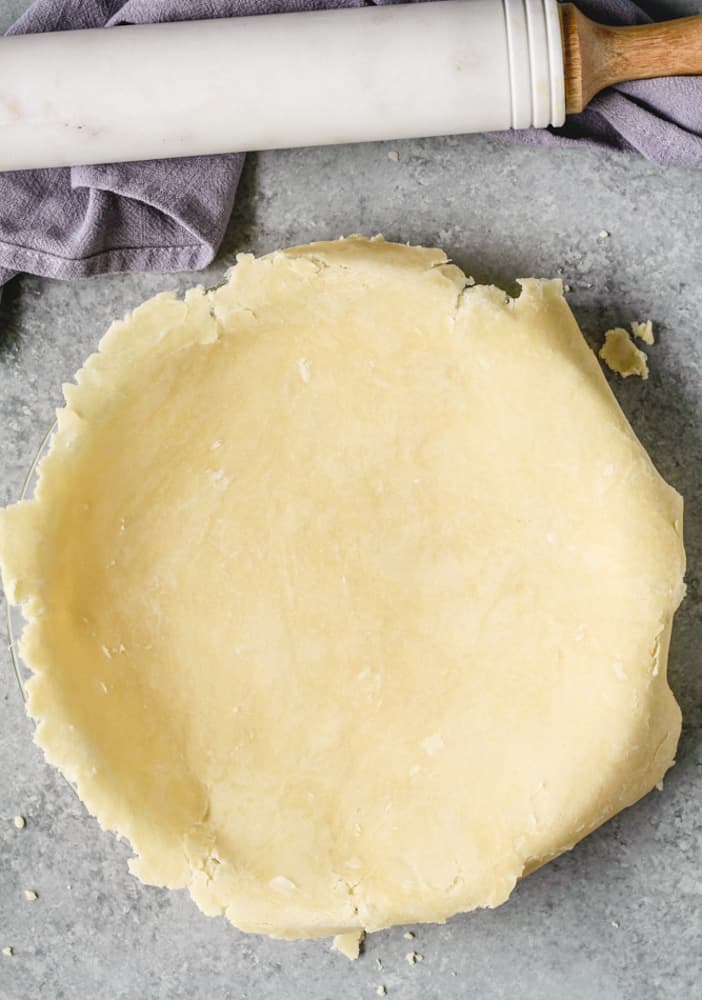
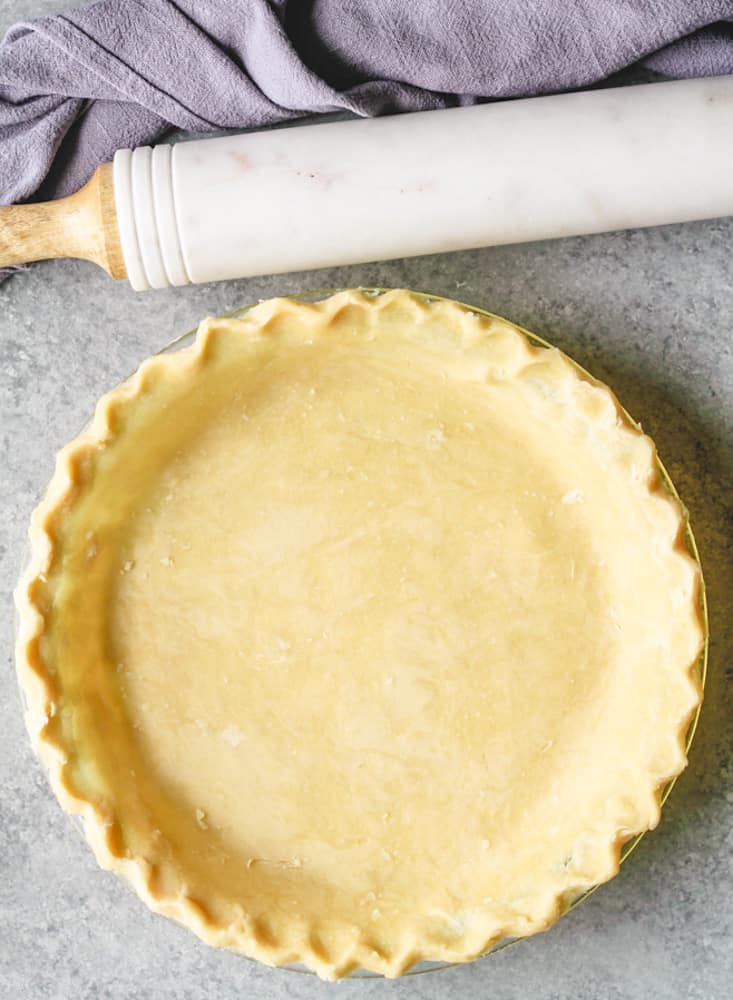
- Press the dough down in the pie plate and around the sides. Trim the dough until you have a half an inch overhang all the way around. This dough is so easy to work with. So if you have more on one side of the plate, just pinch it off and add it to the side that needs more dough.
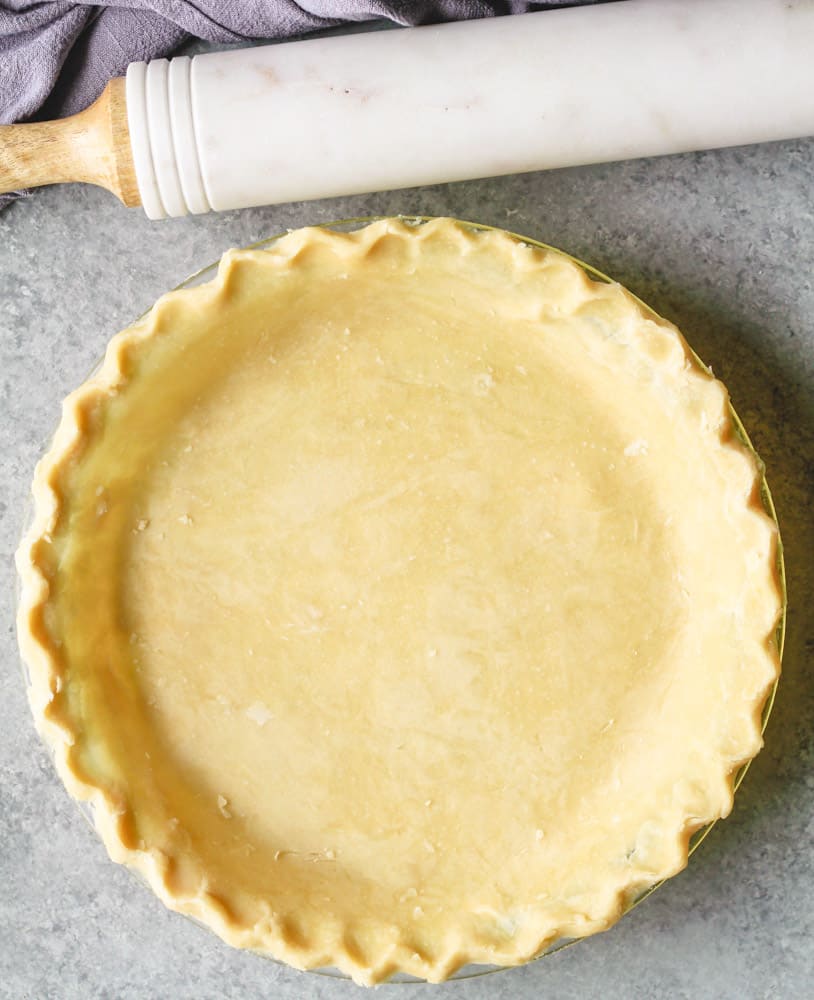
- Tuck the edges of the dough underneath itself, making sure that the dough sits right on the edge of the pie plate. Decorating the edges is a matter of preference. You can do a simple fork edging or a ruffled edge. Here is a great tutorial that's less than 2 minutes. Check it out!
- Proceed with your pie according to the directions. For a blind bake, use a fork to pierce the bottom and sides of the pie crust (or use pie weights), and bake for 10-12 minutes at 425 degrees F.
Perfect Pie Crust Tips
- Cold Pie dough is easier to work with, so make sure your water is ice cold. You can even chill your flour in the refrigerator beforehand.
- I like using a glass pie plate because you can see when the bottom and sides of your pie are browning.
- For a blind-baked crust, try using pie weights to prevent the crust from puffing and shrinking. Or, in a pinch, pierce the bottom and sides of the crust with a fork. Then, about halfway through baking time (before the crust sets), take the pie out, gently push it back down if it has puffed up, and continue baking.
- Use a pie crust shield to prevent your edges from browning too quickly. I purchased the Mrs. Anderson 10-inch pie crust shield. It fits my 9-inch Pyrex glass pie plate perfectly and it sure beats the old aluminum foil method.
- Wax paper makes the process of pie crust making a snap, but please do not simply toss it after use. You can reuse it time and time again by simply rinsing it with warm water or a mild soap and drying it. It's cheaper and better for the environment- win-win!
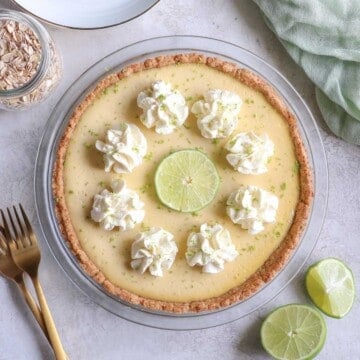
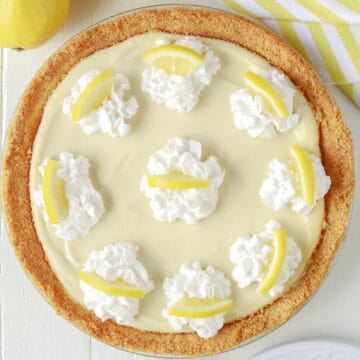
Craving Pie?
Check out these vegan recipes:
I hope you find my recipe and tips for Canola Oil Pie Crust (3 Ingredients) helpful. Please give it a try, and you'll see that you don't need to be a master baker to create a beautiful pie right at home.
Enjoy!
Crystal
📖 Recipe

Canola Oil Pie Crust (3 Ingredients)
Ingredients
- 1 ¼ cups All Purpose Flour
- ⅓ cup plus 1 tablespoon canola oil or vegetable oil
- 2-3 tablespoon ice cold water
- ½ teaspoon salt see notes
Instructions
- Mix the salt and flour together in a medium-size bowl.
- Add ⅓ cup plus 1 tablespoon of canola oil to the flour.
- Stir with a fork until the mixture comes together and is crumbly.
- Stir in water one tablespoon at a time until you can form a ball, being careful not to overwork the dough. It will look slightly marbled, and that's ok.
- Form a ball and flatten it slightly so it's shaped like a disk. Transfer it to a piece of wax paper.
- Cover the dough with another piece of wax paper and roll it out until you have a large circle. When rolling it out, start in the center and work your way out, turning the wax paper as you go.
- It will not be a perfect circle, and that's ok. Just do your best you roll it out until you have at least an inch overhang from your pie plate. Place your pie plate on top for reference.
- Once it's the correct diameter, remove the top piece of wax paper very carefully. Gently release any dough that tries to stick.
- Invert your pie plate on top of the dough and gently slide one hand underneath the wax paper. Use the other hand to hold the pie plate and flip the plate so that the wax paper is on top. Remove the wax paper, and now the dough should be inside your pie plate.
- Press the dough down in the pie plate and around the sides.
- Trim the dough until you have a half an inch overhang all the way around. This dough is so easy to work with, so if you have more on one side of the plate, pinch it off and add it to the side that needs more dough.
- Tuck the edges of the dough underneath itself, making sure that the dough sits right on the edge of the pie plate.
- Decorating the edges is a matter of preference. You can do a simple fork edging or a ruffled edge. Here is a great tutorial that's less than 2 minutes. Check it out!
- Proceed with your pie according to the directions. Or, for a blind bake, use a fork to pierce the bottom and sides of the pie crust (or use pie weights) and bake for 10-12 minutes at 425 degrees F.
Notes
- Cold Pie dough is easier to work with, so ensure your water is ice cold. You can even chill your flour in the refrigerator beforehand.
- I like using a glass pie plate because you can see when the bottom and sides of your pie are browning.
- For a blind baked crust, try using pie weights to prevent the crust from puffing and shrinking. Or, in a pinch, pierce the bottom and sides of the crust with a fork. Then about halfway through baking time (before the crust sets), take the pie out, gently push the crust back down if it has puffed up, and continue baking.
- Use a pie crust shield to prevent your edges from browning too quickly. I purchased the Mrs. Anderson 10-inch pie crust shield. It fits my 9-inch Pyrex glass pie plate perfectly, and it sure beats the old aluminum foil method.
- Optional add-ins: Try adding a tablespoon of sugar for a sweet pie crust or some fresh herbs if you are making a savory pie.
Crystal Yentzen says
It should be slightly crumbly and definitely not paste like. But it’s such an easy crust to work with that I suggest you go ahead and proceed with just maybe 1 tbsp of water to start. Please let me know how it turns out so I can help you troubleshoot.
Samantha Levang says
Thank you for responding so quickly! I tried the recipe twice, and the second time I packed the flour a little more tightly. That made it more crumbly. The first time I just added a little more flour, maybe 1/8C. That did the trick. It worked out really well, and the crust was flaky and delicious.
Crystal Yentzen says
I’m so happy the recipe worked for you and that you enjoyed it. Happy Thanksgiving!
Belinda Romeikat says
Worked out perfectly, I added some flax seeds and jackfruit curry filling.
Thank you, great recipe
Crystal Yentzen says
I'm so happy you liked the recipe! And jackfruit curry sounds delicious!
Aleisha says
Awesome recipe, I'll be keeping this one bookmarked until I memorise it! 🙂
Crystal Yentzen says
Thanks so much! I'm so glad you like the recipe!
nancy says
awesome!! so easy and takes only 3 ingredients! i'm sold!
Andrea says
absolutely love how simple this pie crust is to make! so so good!
Crystal Yentzen says
Great! That makes me so happy!
EMILY says
Love this pie crust! Mine didn't quite look as pretty as yours but it was so good!
Sean says
I has been a while since I have used a liquid oil in a crust and this one was spot on. Delightfully tender and flaky.
Natalie says
Finally, I found a perfect pie crust recipe! Loved to make it and how it turned out, thanks!
Katie says
Love this vegan pie crust! Super easy to make and works great with all kinds of pies!
Gary says
This is a very nice, simple, flaky crust. Thank you!
Sharon says
Does this make just a bottom crust? Would double it for a top crust!
Crystal Yentzen says
Hi Sharon! Yes, this recipe makes one crust. Double the recipe if you want a top crust. Let me know how it turns out!